Campaign Creation
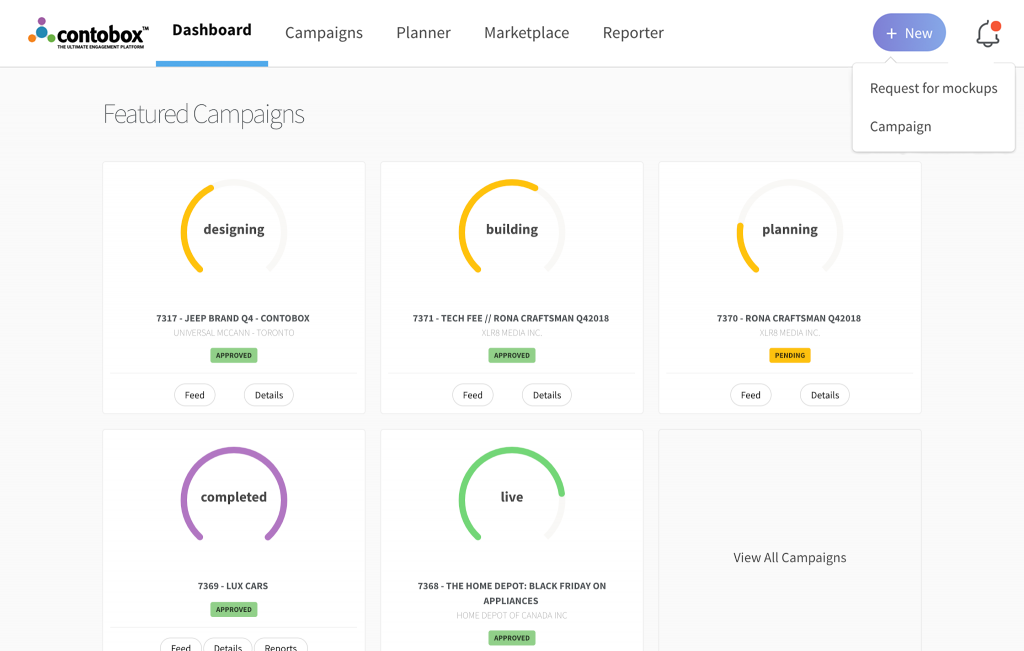
To create a new campaign from the dashboard, navigate to the upper right-hand corner of your screen and select “+ New.”
You’ll see a drop-down with two options: Request for Mockups and Campaign.
Request For Mockups
Select Request for Mockups if you’re in the midst of setting up a meeting or pitching a client on a Contobox campaign and you need to create presale mockups, or if a client has requested presale mockups. If you select this option, you’ll be required to fill out the anticipated flight time of the campaign, a deadline for the Contobox Experience Manager (XM) to turn around the mockups, and at least one ad type.
Campaign
If a campaign has been sold and you’re ready to fill out specific IO details, select Campaign.
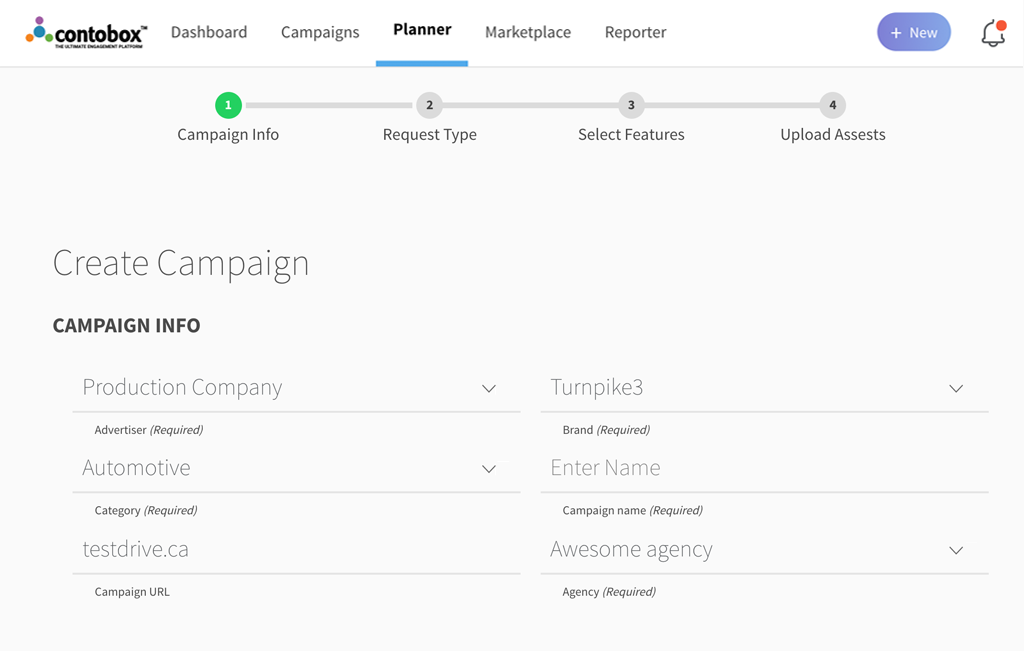
The first step includes filling out basic campaign info, including: the advertiser (Like P&G, Unilever or Ford), brand name (Tide, Dove, F-150), category (CPG, Automotive, etc), campaign name, and URL of the landing page your campaign will drive to. All of this information must be filled out to move onto the next step.
You’ll notice that as soon as you begin filling out your campaign info, it will automatically be saved as a draft. If you exit your campaign before you finish filling out all of the details, your draft campaign will be visible on the Dashboard.
You can re-enter your campaign and continue editing by going to its feed. You’ll find a link to edit your campaign at the top of your feed next to your campaign name.
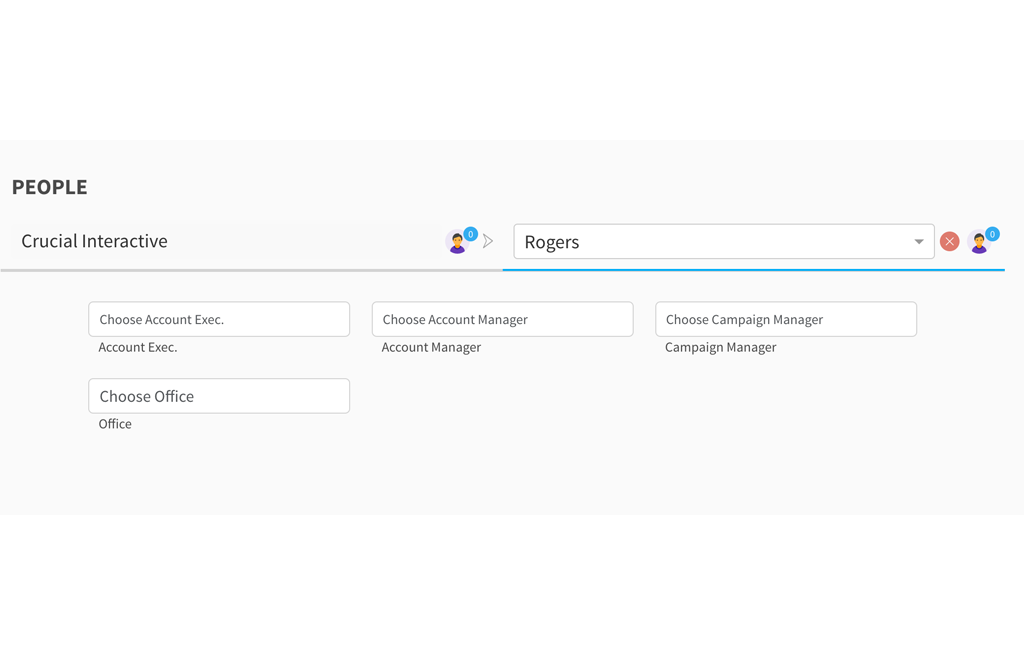
Once you’ve filled out the basic information, the next step is to fill out the names of the your Contobox contacts who will be managing the campaign. This will depend on whether your campaign is managed by Contobox or a licensed partner. Their name, image and email address should appear as you begin typing.
Objectives
Next, you’ll select both primary and secondary objectives for your campaign from these drop-down menus, which could include everything from driving online engagement to in-store foot traffic. Quantifiable objectives are key to every successful campaign, which is why we want to identify those objectives early in the process. These will also help us recommend the best Contobox features to engage your audience in a way that meets those objectives.
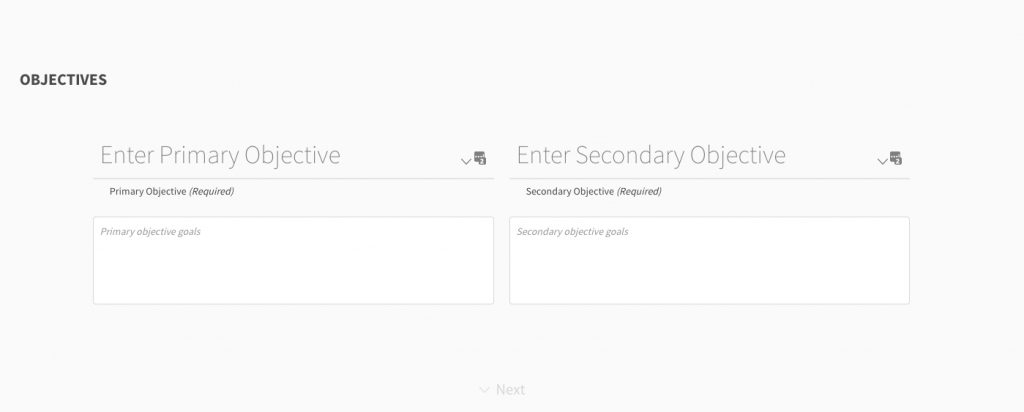
Your objectives will determine your goals, which you can detail in the text box below. For example, if your objective is to drive website traffic then your goals could include the amount of unique visitors and pageviews your website receives as a result of the campaign.

List of Objectives:
Data Collection
You would like to collect data on users and audiences. This can also include gauging the interest of an audience.
Drive Conversions
You want to trigger a certain amount of conversions with your campaign. Conversions entail a completed purchase or any action that can be considered a conversion such as filling out a form or scheduling a test drive.
Drive Engagement
Your goal is to get users to interact with a brand and spend more time engaged with them.
Drive In-Store Foot Traffic
You want to encourage users to go to a physical store location.
Drive Website Traffic
You want to drive users to click through to a specific website.
Earned Media (Social)
You are trying to get more users to post about your brand on social media (tip: incentives will help inspire users to share a branded post).
Increase Awareness
You are interested in increasing awareness for your brand, product, promotion or anything else you want to inform consumers about.
Increase Brand Favourability
You want to improve the public perception of your brand.
Lead Generation
Increasing the number of users in your database. Leads are often generated through email sign-ups, rewards programs, contest forms, and anything else that would require contact information from an individual to be forfeited.
Build Types
Next, you’ll be asked to select your “build type” from a list of four options: Custom, Express, Local, and No Build.
Custom campaigns allow you to integrate any features from the Contobox Marketplace, or work with the Contobox team to build completely new and innovative ones suited to your campaign and the devices you’re running across.
Express campaigns are quick-to-market, multi-platform, multi-device campaigns that use templated layouts and Contobox’s most popular features, like image galleries, hashtagger, social waller and videos. You can find out more about these features and any others you can integrate into your campaign under Marketplace.
Local means you’ll be utilizing the R.E.D. Contobox platform. This option offers specific templates based on ad units featured within Rogers’ premium-owned and partner properties.
If you’re running a standard display or retargeting campaign, select “no build.”
Request Types
Once you’ve filled out all of the necessary campaign information, you’ll be brought to Request Types. Here, you’ll begin by confirming the sales stage.
The three types are:
- Prospecting
- RFP
- IO Booking
Prospecting
If you’re in the midst of setting up a meeting or pitching a client on a Contobox campaign, you would select prospecting. In this case, you’ll be required to fill out the anticipated flight time, the date of the meeting, and at least one ad type: Desktop display, mobile/tablet display, video and custom.
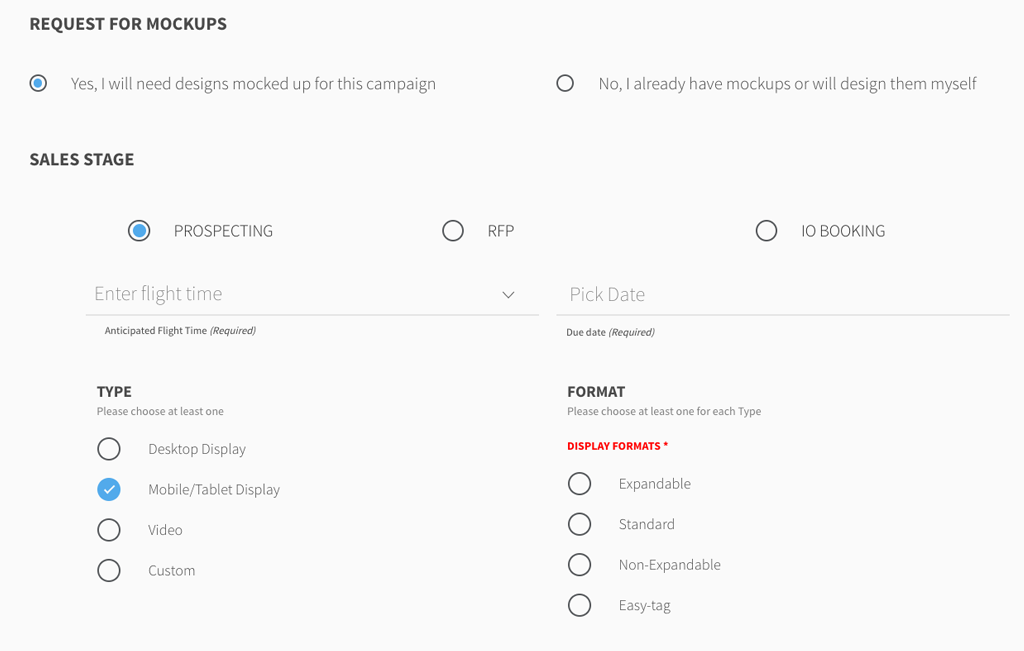
Once you’ve selected your ad types, you’ll be required to choose at least one format: Expandable, standard, non-expandable and easy-tag.
RFP
If a potential client has requested pre-sale mockups, select RFP. You’ll then need to indicate the currency and campaign budget, the anticipated flight time of the campaign, and a deadline for the Contobox Experience Manager to turn around mockups for the RFP.
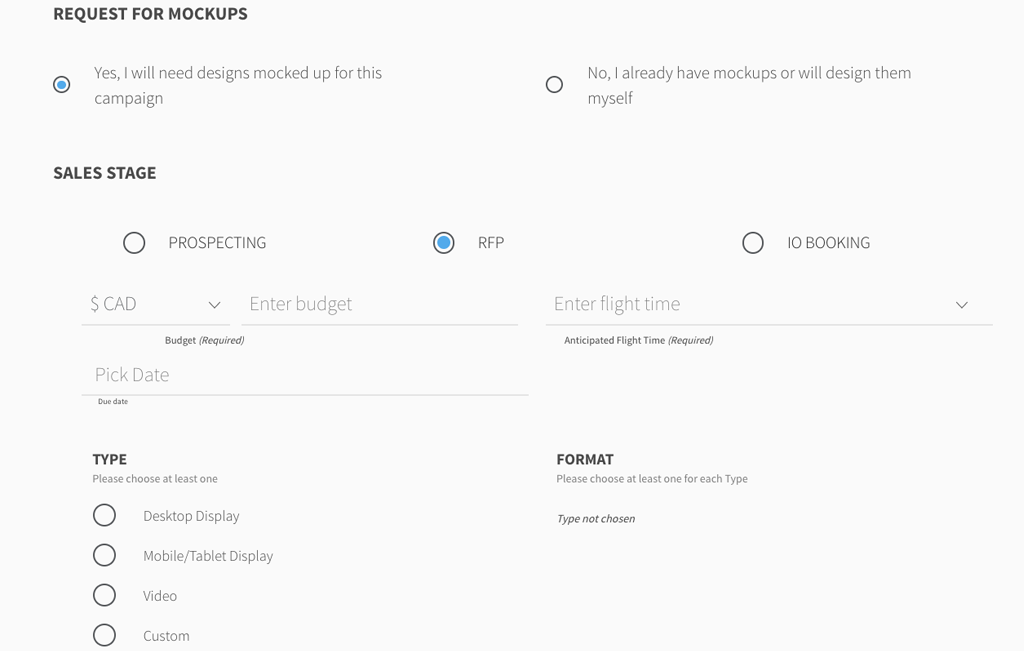
Once again you’ll need to choose at least one ad type and one format for your campaign before moving to the next stage, and any other relevant details can go in the text box at the bottom.
IO Booking
If you selected “Campaign” from the ‘+New’ button, the sales stage will default to “insertion order” and you’ll see a section to add IO lines, which must be filled out to continue with the campaign process.
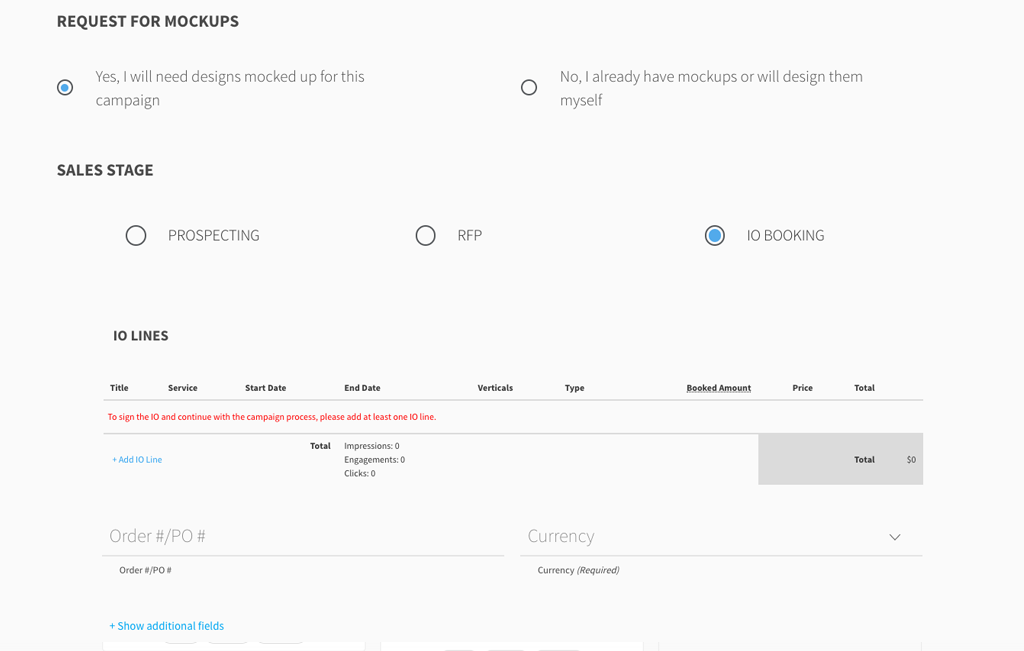
You only need to add one IO line for each campaign, however, if you want your campaign to operate under a variety of cost specifications, you’ll need to add multiple IO lines.
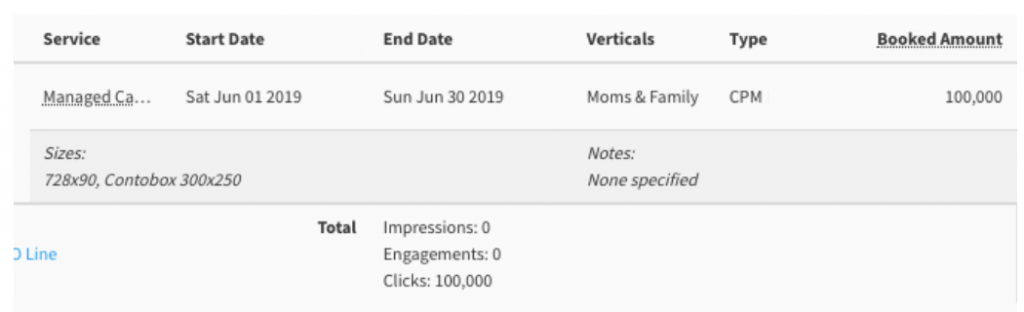
When adding an IO line, you’ll want to indicate the name and the service type: managed or self-service.
Select managed to run across our premium publisher partners using a cost per engagement (CPE) model, meaning you only pay when users engage with your campaign.
Select self-service to deliver your Contobox units programmatically across certified ad exchanges.
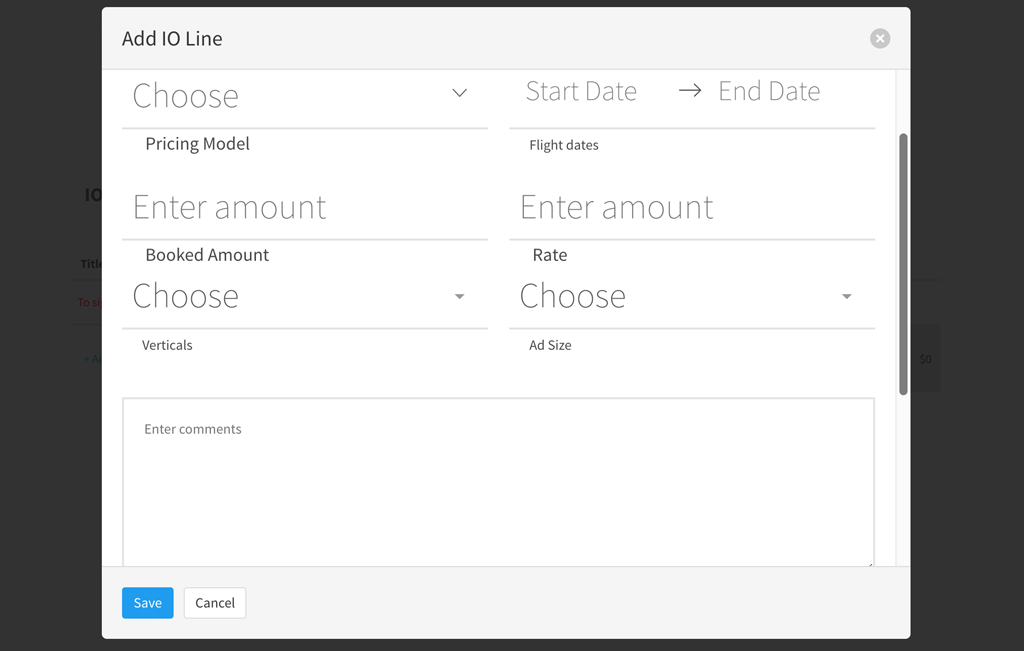
Then, select your pricing model: Cost-per-click, cost-per-engagement, cost-per-thousand impressions or custom. Whatever you select from this dropdown should correspond with your campaign goals and ad types.
After that, you’ll select the flight dates of your campaign.
You’ll then indicate the number of “booked engagements” for your campaign and the rate, both of which should be based on the pricing model you select.
You can also choose separate verticals for each IO line. For example, if you’re running ads for a barbecue, you could select “Food and Recipes,” “Men’s Lifestyle,” “Home Improvement” and “Outdoors.”
You also need to indicate all of the ad sizes you’ll be running with this IO.
Add any additional details to your IO line in the comments section.
When you’re done, click save and all of the relevant details will appear under IO lines. In the far right-hand corner, there are three buttons, which allow you to edit, duplicate or delete the IO line.
If you want to create a second IO line, you can either click “Add IO Line” again or duplicate the existing IO line and edit the details as needed.
Once you’ve added one or more IO lines, the total number of booked impressions, engagements and clicks for your campaign will appear at the bottom.
Below the IO lines you’ll find additional fields to include more information, like the agency and estimate code, client and product names, out clause, and reporting base.
You also have the option to upload a signed copy of the IO and agency booking document under Campaign Files, and include any notes and advertiser terms.
None of the above details are required if you’ve included at least one IO line, however, we do recommend filling out as much information as possible to make it more accessible in the future.
From here, you can save your campaign as a draft or move on to the next stage: Selecting Features from the Contobox Marketplace.
Select Features from our Marketplace
This is the fun part where you get to select all the interactive features that will help you engage consumers with your brand. The Marketplace can be reached through the nav bar at any time, have a look around and see what features are available for your campaign.
Based on your industry and the objectives you selected when filling out your campaign information, the EMP will recommend a set of features to include in your creative.
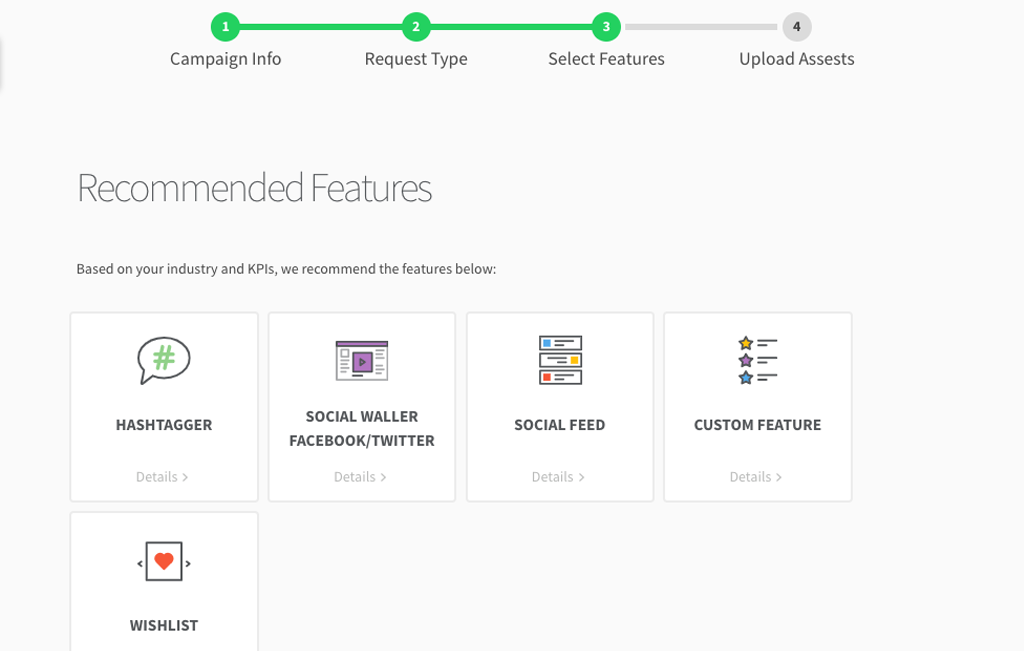
For example, if you selected Drive Foot Traffic as one of your campaign objectives, one of the recommended features would be a store locator, which would allow users engaging with your ad to find the stores closest to them without ever leaving the page.
These are simply suggested features, and you don’t have to include any of them if they’re not needed. If there’s something you’re looking for that’s not included in this list, or you’re simply looking for a bit of inspiration, you can find a full list of features — available across all platforms and formats — further below.
To help you sift through all of our features, you can search for what you’re looking for.
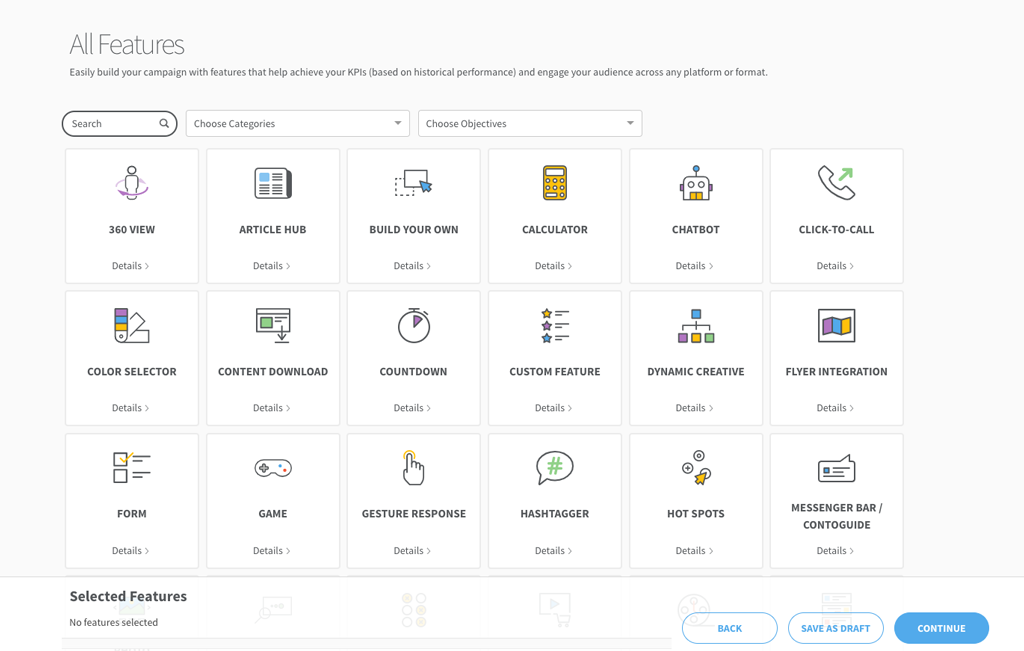
There’s also the option to filter according to your brand category.
For example, if you filter by the Travel and Tourism category, you’ll see features like the calculator, which would allow users to calculate trip costs, and Social Waller, which would allow users to share content from their dream destination directly to their social feed.
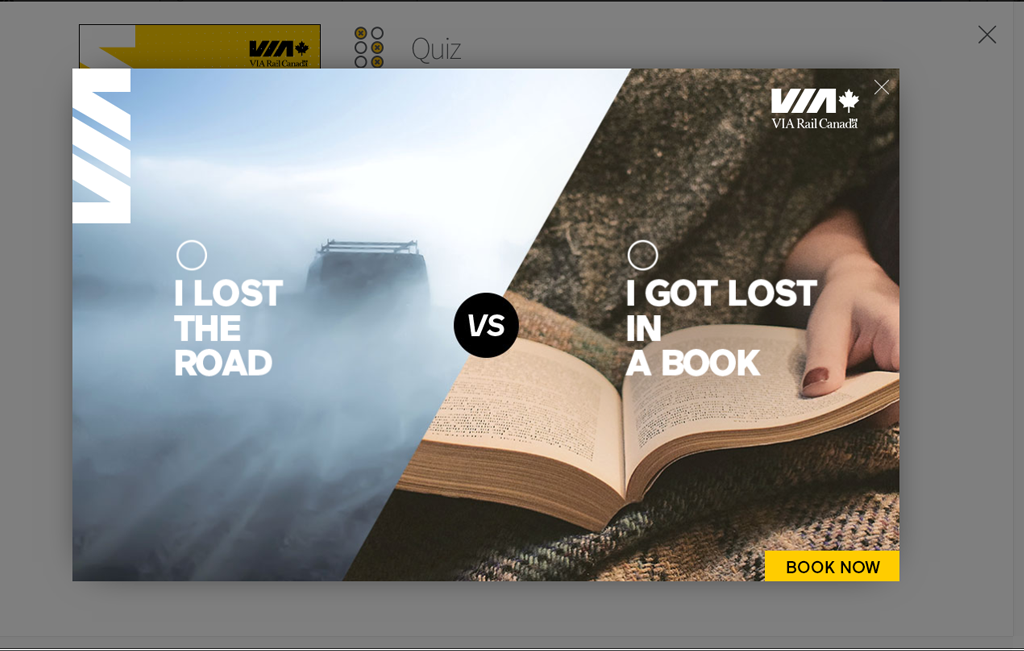
Click “Details” to learn more about each individual feature. This will give you a brief description of what the feature is and how it works, the assets you’ll need to implement the feature, static previews of what the feature will look like in expandable and and non-expandable ad formats, and a sample Contobox unit from a previous campaign that utilized the feature, so that you can review the feature to see how it functions and appears when it’s live.
Of course if there’s a specific feature your team had in mind, or you’d like to work with the Contobox team to build something new and innovative for your campaign, you can select “Custom Feature.”
With so many options available, it can be easy to get carried away, however, we do suggest limiting the number of features included in your campaign. Typically, for custom campaigns, we recommend no more than 4 features, more and the campaign risks dividing your audience’s attention, which jeopardizes your ability to engage them. Express campaigns’ can have up to 3 of our most popular features.
Once you’ve selected features, you can either save a draft of your campaign, at which point you’ll be redirected to the campaign’s feed. Or, if you’re ready to submit the campaign for review, you can click continue to move to the final step: Uploading assets and submitting your campaign for review.
Submitting for Review
Before submitting your campaign for review you’ll be asked to upload campaign assets.
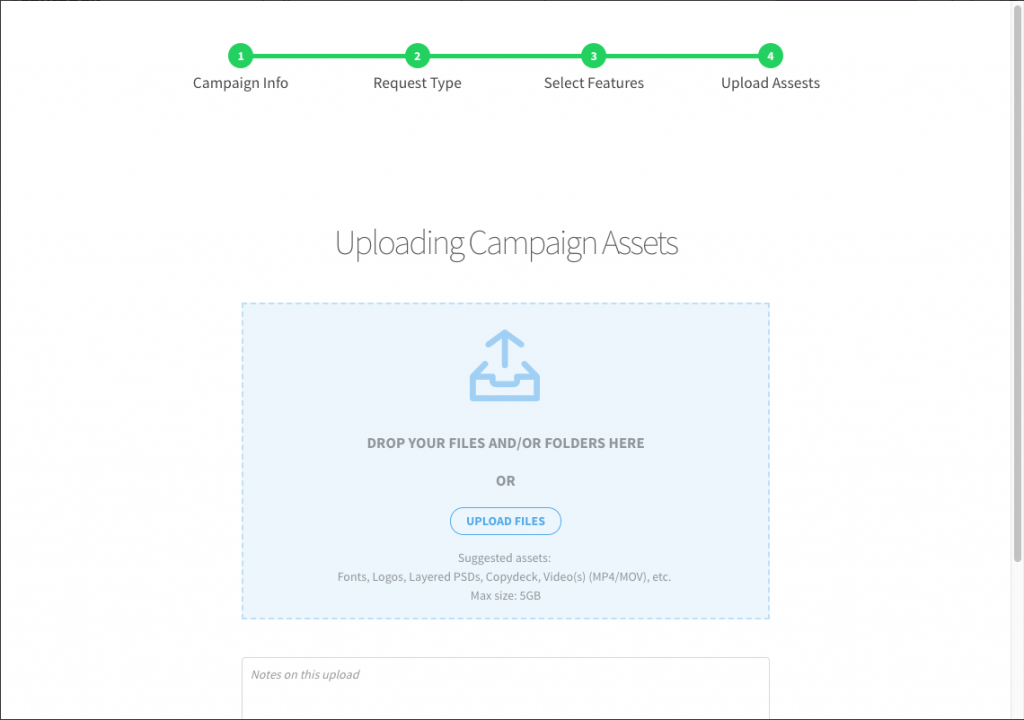
This includes any relevant documents the Contobox team may need to build out your creative. Think brand guidelines, logos, videos, fonts, copy decks and even background information. You can upload any file up to 5GB in size.
If you’re still working on gathering these assets, you can save your campaign as a draft, at which point you’ll be brought back to the campaign feed. The option to edit your campaign appears next to your campaign ID and name.
If you have everything you need, click Submit Campaign for Review.
You’ll then be brought to your campaign feed, where you’ll see any assets you’ve already uploaded as well as a notification that your campaign is being reviewed.
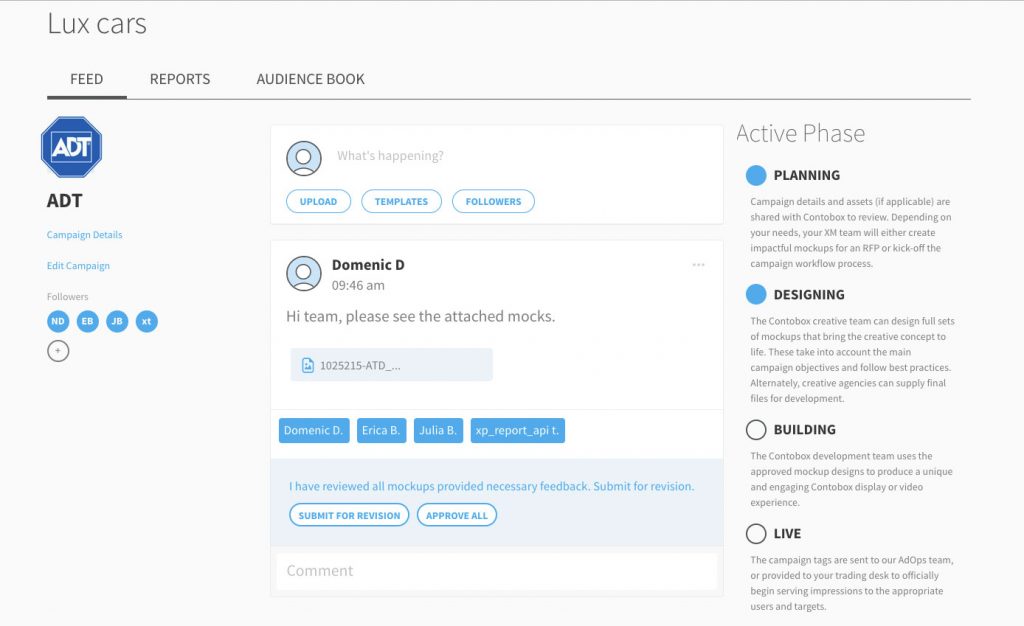
Once you submit a campaign for review, all of the campaign’s followers — including the Account Executive, Account Manager, and Campaign Manager you selected while filling out your campaign information — will be notified via email that you’ve created a campaign.
When the Experience Management team has had the chance to review your submission, they will either approve the campaign and be in touch regarding next steps, or follow up with questions or feedback about your submission. Typically, you’ll receive a response from the Contobox team within a few business days.
To review all of the information you submitted while creating your campaign, click on Details at the top of your feed.
If you’re missing any information, or notice any details that need to be changed or added, navigate back to your feed and select “Edit Campaign.”